Showing posts with label reuse. Show all posts

Tuesday, March 26, 2013

Glass Honey Dispenser

We consume a lot of honey in our house.  I'm not convinced that local honey will cure my allergy symptoms but I am convinced that it's yummy, which is why I put so much of it in my tea.  We buy it in bulk but pouring a little bit into my tea from a 6 pound jar is awkward to say the least so I keep refilling my old plastic bottle.  He's a cute little bear but he's plastic, which makes it easy to squeeze and keeps everything clean, but it's still plastic.  I'd rather not store my food in plastic.  Plus, the flip-top lid broke last month.

I didn't want a mess so those super cute pots with the equally cute dippers were out of the question.  (Yes, I know there is a technique but I didn't want to explain it every time someone needed some honey!)

So I was stumped.  I started asking friends but, like me, they were also still relying on their old friend, the plastic honey bear, too.

Then I found this:
Hello, sleek glass dispenser.  Good-bye, plastic bear. 

It is actually marketed as a maple syrup dispenser but so far it's working well as a honey server too.  It quick, easy, and clean!  (No explanation required.)  Plus, since I like simple lines, I think it's even cuter than that old honey bear.

Do you have any other ways I can replace some of that lingering plastic in my life?
Peace,
Stacey

Thursday, February 28, 2013

Homemade, Repurposed Gift Wrap (FREE!!!)

We've been invited to a lot of birthday parties lately.  (I know! We're very lucky!)  Parties are a great time to have loads of fun, enjoy a tasty treat, and let someone know you care about him/her.  How fun is that?!

I'm definitely not one who thinks a gift is necessary to let someone know he/she is important but it's usually appreciated (especially by the under 10 crowd) so here's how we wrap those gifts.
And, yes, it's usually a book and a donation.
Yep, it's just some good ol' artwork.  What can I say; I like to paint. ;)  It's very gratifying to know you created part of the package too.  If you have kids, this might help free up some of that valuable real estate on the front of your fridge.  Really, it's a win-win.  Repurposed wrapping (FREE!) that gets some clutter (beautiful as it is) out of your house, while boosting the artists self-esteem all at the same time.

What?!  You don't have stacks of artwork just piling up on the front of your refrigerator?!?  My sister likes to use the comics section from her daily newspaper.  Older kids love this because they can read it too!  I've used maps from vacations.  These are fun because they're usually brightly colored and seem to multiply otherwise.

There's also the option of using reusable bags (if the recipient needs/wants them!) or even using part of the gift itself like dishtowels (think: weddings or housewarmings) or blankets (babies) as the wrapping. 

Personally, I usually stick to the artwork, newspaper, or maps because I think it looks pretty and it gets it out of my house. ;)
Yep, same theme but different book.

With all this being said, please, don't give me a gift.  I'd rather share a meal or an adventure.

I know you have some great ideas out there.  Please, share.
Peace,
Stacey

Thursday, February 7, 2013

Use What You Have

Quick!  Name something that's really easy to do and green at the same time.  Oh, that's a good one!  You should put that in the comments.  

I was thinking about using something that we already have rather than buying something new - no matter how environmentally-friendly the new thing is.  It's still better to use what you have until it fails to meet your needs.  (And as my dad used to always ask me, "do you need it or just want it?"  My dad should be proud every time he looks at the sink in our new kitchen!)

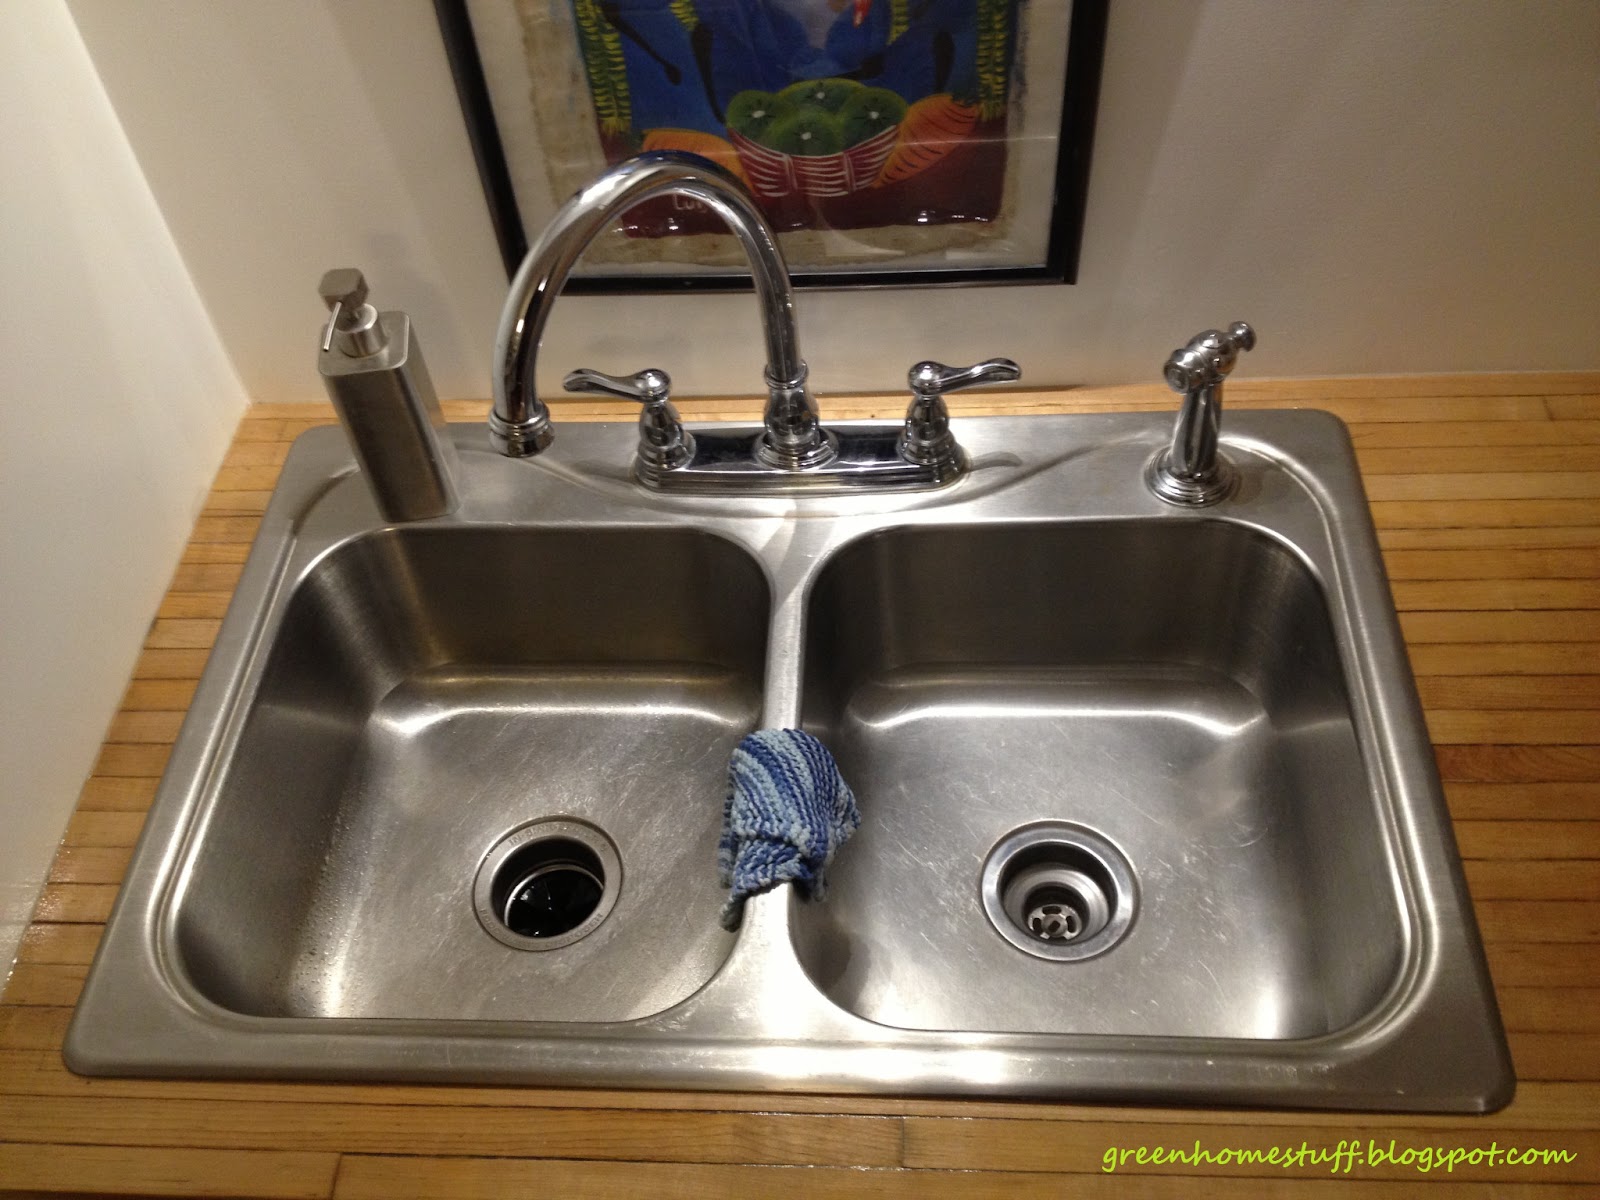
Mr. Green Stuff and I really wanted to replace our old sink with a different one.  Our original plan was to reclaim an old farm house sink (with the drainboard and all!) but then we remembered how scratched and disgusting the porcelain sink was that came with our house.  After that was scratched off the list, we talked about a trendy under-mount sink.  We weren't looking for trendy and we were concerned with the bowling alley counters being exposed to that much water so that was nixed.  Then we looked at new square stainless steel sinks.  They were all really great looking but then realized they weren't that much different than the one we put in our kitchen when we bought our house.

So here's what we put in:

Our old sink.  Isn't it lovely?  It may not be the oldest, the coolest, the trendiest, or the fanciest sink around but it makes me happy that we kept it.  And that makes it fancy-cool to me! 
 
What have you been able to reuse lately? 
Peace,
Stacey

Monday, February 4, 2013

Buy "Local" Books Online

O.K., by now you know I don't really like to shop.  (Oh, if my teenaged self could see me now!)  When I have to get something, I try to find it used.  Buying used usually means that it takes a lot more time to find.  That is unless you're looking to buy used books!  Amazon.com has made it so easy.  In fact, it's so easy that there's almost no point in buying one new anymore.  (Almost!)  Here's a simple little tip for greening your used book buying, which is inherently green already.  Find the one that's closest to where you live. Obviously, if there's a used book store in your town, you've already found the one that's the most local.  If you're not so lucky or they are out of what you want, here's an example for buying one of my favorite books on amazon:
In the third column (Seller Information) it lists specifically where the book ships from so all I need to do is figure out which state (in this case Utah, Oregon, Maryland, or Virginia) is closest to where I live and buy that one because the price and condition of each are all similar.  Ebay and Etsy also list where your goods will ship from.  

The shorter the distance the book has to travel/ship, the less gas it will take to get to me, Yeah for a smaller carbon footprint!

That's it.  Easy enough, huh?  Happy shopping! 
Peace,
Stacey

Thursday, January 31, 2013

How We Turned A Bowling Alley Lane Into A Kitchen Counter (Day 1)

This was a daunting task.  I knew we could do it but it was one of those things that I was just afraid to begin.  We kind of kept putting it off until neither of us could park in the garage, the cabinets were scheduled to be installed, and, well, we just knew it was time.

We knew the dimension we wanted and we knew one of the bowling alley lanes was in much better condition than the other so the "good" one was picked to be our 9' section.  Each one was 10 feet long so not much was needed off the ends.  The sides were another story because bowling alleys are 42 inches wide.  As a reference, a standard counter is 25 inches deep.  I just assumed we make this job as easy as possible because each one of those skinny little boards is 2.5 inches deep and held to the adjacent ones with screws and/or nails.  I thought "we" would just cut one side off but lucky for me, I'm married to a guy who like things done the right way.  Having a carpenter (with all his knowledge and tools) as a friend is also very handy.

Anyway, the boys cut off equal amounts from each side so the arrows would be centered at the end of my "new" counter!

Another interesting tidbit is that even though there are thousands of screws holding these lanes together, braces are still needed underneath to keep the center from sagging or bowing!  Luckily, I did my research and knew this and the guys were smart enough to shorten and replace the braces that were already in place so we could just reuse what we had.

In order to put the counter on top of the cabinets, the brace could not cover all of the boards in the bowling alley.  We decided to put 10 inch screws into the front not only to secure the last 2 or 3 boards but also to simulate the look of the screws throughout the entire lane-turned-counter.

Before those screws were put in though, I wanted a line routed into the face of the front piece of wood.  This exaggerated what was already there because the edge of counters shows how each board is slightly tongue-and-grooved to the next one.  I thought it would look cool if this was more prominent.

After they brought the giant and heavy bowling alley counter-top inside to scribe it to the wall, it had to go back outside to actually be scribed and then sanded.  (I was not part of this scribing process so if you're using this as a tutorial, let me know and I can find out how they did it.)

Sanding the old sealant off, baffled us.  It wasn't just the potential toxins in the sealant but I also didn't know what to use.  I didn't know if we should rent an industrial floor sander or simply use our palm sander and the belt sander that our friend owns.  We ended up using a combination of a hand sander (I felt very 19th Century) and the palm and belt sanders. 
We started with 80 grit sandpaper and progressed all the way up to 220 grit to make it nice and smooth.  It was very messy and I've never been so happy to wear a face mask!

It was tedious work but achieved the look we wanted.

The next step was to get it back into the house so it could be sealed but sealing is another day and another post.  (Spoiler alert!  It turned out great.  We've been using is since the last week of November.)
Peace,
Stacey

Thursday, December 13, 2012

ReStore Donations

We finally had a chance to take a bunch of our donations to our local Habitat for Humanity ReStore.  There were three hanging lights (the word "chandelier" makes them sound too fancy), two exterior lights that used to be mounted around our back door (which is now a window), about 30 cabinet knobs, a pretty transom window, and this:
It looks so much nicer right there next to a toilet than it ever did in the middle of my dining room!

I always feel a sense of relief when I donate something.  Today I felt so much better... lighter, freer, and happier! Kind of like the music in this video...
Is it bad that I "love" the landfill in that video?!

What do you have just taking up space in your house (hopefully not in the center of your dining room) that someone else would love to have?
Peace,
Stacey

How To Clean A Paint Brush

Meet my best friend:
O.K., a paint brush is not my best friend, but I have seen more of it lately than any of my friends... maybe more than all my friends combined!  I've been busy... painting.
 And painting.
 
And painting.
Eventually almost everything in the new kitchen will be painted... white.  And most of the painting has fallen onto my shoulders, which in my opinion is waaaaay better than drywalling, installing the floor, or building countertops.  I think I'm getting the easy jobs.  Easy but tedious.

Anyway, back to the brush!  I've been using that paint brush for multiple hours almost every day for the last few weeks.  (I told you we were close!)  And I recently learned a great trick for keeping my brush in "like new" condition.  Seriously, I used to just run water on it and squish it against the side of the sink and think it was clean enough.  It would look like that picture at the top and I would think it was good. 

I bought cheap brushes because they wouldn't last long anyway.  Then I bought my new BFF-brush.  I spent a lot of money on it ($14!!!) because I want everything to look pretty on this project.  There's a huge difference between those value pack brushes and this one.  Huge!  

But after I'd primed with it, painted with it, primed with it, and then went back and painted with it again, it was not in good condition.  Bristles were sticking out sideways.  Globs of paint were balled up all down the middle of it.  It looked destined for the landfill.  As I was trying to get over my green guilt about having to throw it away and work up my courage to buy another "expensive" one, a friend told me that I'd be crazy to throw away that brush.  (Picture it in much, much worse condition than in that the picture above when he said that.)  Then he showed me the aforementioned trick to save my paint brush.

Here what I do now.
  
First I rinse my paint brush with warm water to remove most of the paint. This is the step where I squish it up against the side of the sink or my paint container, too.

Then I squirt a small amount of (biodegradable) soap directly onto the bristles. I usually use hand soap because I've been in my basement bathroom but dish soap works well too.

Next I rub in the soap.  I focus on the places were the paint is the thickest.  (For me this is usually that line where I wipe the brush against the side of my paint container to get off the excess paint.)

Here's the most important step. Rub the bristles between the palms of the hands.  Vigorously!
Even if you don't like to get your hands messy, it's worth it.  Believe me.  I don't either. Apparently, if you have hands that feel like sandpaper, this step goes faster.  Otherwise just rub a little longer. Rinse the paintbrush until clear water runs out of it and no more bubbles form when you rub your hands together on it.
And there it is:
A like new paint brush every time.  (I probably don't need to mention this but this trick is only for cleaning water-based paint/polyurethane.)

My friend said he's been using the same paint brush for almost 14 years. When he finishes a project and knows it will be months before he uses it again, he even puts hair conditioner on it to keep the bristles pliable.  (I hope to get to this step next month!  Right now I consider myself lucky if the bristles are dry before I use it again.)

What an easy way to extend the life of a paint brush so it can be reused and reused and reused and, well, you get the picture.

Do you have any easy clean up tips?  What about great painting tips?  I'm open to either!
Peace,
Stacey

Tuesday, November 20, 2012

How We Installed Our Reclaimed Floors

Last weekend was quite productive around here.  Check, check, check it out:
The finished reclaimed tobacco barn wood floor
I know!  They're beautiful... but they took a lot of work.  It all started late Friday night.  Mr. Green Stuff and I put on our work gloves and jumped right in to our pile of splintery wood.  For us the real beauty of this wood is that it came from those old barns in Pennsylvania but that also gave us our own set of problems.  The splinters were the worst for me.  (And by "the worst for me" I don't mean to imply that I ended up with the most splinters because I didn't. I am the only one still whining about them though.)  I just mean the other issues like a few warped boards and figuring out the layout were easier to work around.

When the flooring came from Olde Wood Limited we received four different widths of boards.  I didn't really think it was a big deal because we had roughly (pun intended) 25% of each of the 3", 4", 5", and 6" widths.  I figured we would pick out the boards as we worked our way across the room and it would be fine.  I'm not sure what I was thinking!  I should have known that Mr. Green Stuff would never go for that.  But I digress.... back to Friday night!  We laid out our floor.  There is no particular pattern but we did arrange it so our favorite boards are in the middle of the room. 
Hmm... decisions, decisions

After we had our design arranged, we wanted a "map" of where each board would go.  With this plan Saturday could be all about installing rather than about thinking or planning.  We labeled the back of each piece of wood with a permanent marker.  I wanted this to be as simple as possible (remember I originally wanted to "wing" it) so I naturally called the first row "Row 1" and then each board was given a letter with A being the one to the far left of the room, then B, C, etc.  On the boards that needed trimmed to fit, I put an "X" on the end that I wanted removed.  Confused?  Here's an example: the eighteenth row needed four boards to span the room so we had boards labeled 18A, 18B, 18C, and 18D. 18C needed the right end cut in order to fit so there was an X on the back of it where it would be shortened. We also wrote down (on the map) that they were 3" wide.

As we labeled them, I stacked them on the far side of the room with the last row (28 if you're curious) on the bottom. Once they were in the correct order all we really needed to do during installation was to grab the ones on top and make sure we used A first. (O.K., maybe I'm totally into organization, too.)
All stacked up and ready to go.

Saturday morning while I was teaching yoga, Mr. Green (with a little help) began installing the floor.  Other than being so loud that we had to open the windows and wear ear plugs, it went remarkably well... aside from a few more splinters.  It worked out well.  From our Friday night design, we only needed to substitute one board because the original was warped and replace another one due to a miss-cut.  The whole floor was installed in time for a late lunch.
Ask around before purchasing tools. My brother-in-law let us borrow this "gun."

After our break, the treads were installed on the stairs and the landing was redesigned (we stole our replacement boards from here) and installed.
I love the look of the white paint with the natural floors.

Some friends stopped by to see our progress, which led to some Dark and Stormies, which in turn led to a later-than-anticipated night.  We didn't want them to leave because we knew something else that was "dark and stormy" was looming; the polyurethane was calling our names.  I was dreading this because my mom had warned me about how stinky polyurethane is.  I tried to find one with very few VOCs but it's not easy.  I found a water-based one (rather than oil) but it still had "less than 275 grams per liter."

Guess what?  It turns out that it's not that hard to seal a floor and the polyurethane we found wasn't stinky.  In fact, the smell was almost unnoticeable.  We wanted to get two coats on before we went to bed so around midnight we watched the documentary Bag It while we waited for the first coat to dry.  (I'm pretty sure I saw about 90% of it. From what I saw, I think it is definitely worth a watch!  Plus, the friend I borrowed it from highly recommends it.) Then we applied the second coat.
What?  Everyone else doesn't scavenge for danger tape?

Sunday morning we loved the way the floors looked but some of the really big scratches and knotholes were still rough, which made me fear splinters.  In order to avoid them, we decided to apply another coat.  I sanded the floors with an orbital sander using 220 grit paper.  This barely even dulled the sheen but it was enough to get the next coat to adhere.   And the next coat!  After the fourth coat, we were ready to call it quits.  And not just because the polyurethane was starting to stink.  The floor looked great but there were two spots that were still a bit raised.  It wasn't enough for me to notice with my hand but I could feel my socks snagging on it SO we sanded one more time and applied our final coat of poly!  (We're officially on a nickname basis, poly and I, after all the time we've spent together.)

Now they look and feel gorgeous.  I'm loving our "new" floor.  I'm going to need to keep an eye one Mr. Green Stuff though.  He crazily mentioned how great it would look in the dining room.  I'm just going to ignore that comment for now.


Have you ever started a project like this where you assumed you could figure it out but had no real knowledge about the process when you started?  I didn't even know what an orbital sander was before this!
Peace,
Stacey

Friday, November 9, 2012

The Coolest Light in My House

Mr. Green Stuff made my day when I walked in to see this.  Obviously, it was my evening that he made but there's no catchy cliche about making someone's evening.
My "new" mid-century light!
I already introduced you to this light and its sister, which will hang in the dining room over our table, but now that one of them is out of the box, I wanted to show it off.

Seriously, I knew the new walls (made in the U.S.A. drywall!) and ceiling needed painted before the light when up, but I was still surprised to see this go up almost as soon as that made in the U.S.A., VOC-free paint dried.

I was also pleasantly surprised about how well it lights the room.  I was starting to worry.  Now I feel better.

The wrinkle to this beauty is in the switch.  I bought some of those motion sensor light switches.  (You know the kind. If you leave the room and forget to turn off the light it does it for you after a couple of minutes.)  Well, apparently, the ones I bought are specific to incandescent light bulbs.  

Do you know what happens when you use an energy efficient light bulb with those babies?  Well, let me tell you.  Discos!  Discos happen.  The light was constantly flickering... even when it was turned off.  It was enough to drive a girl mad!  I was starting to doubt my 50ish year old light fixture could be on a motion sensor but it was the 2 year old light bulb I took out of the replaced fixture that was the problem. 

Yes, the website clearly indicates that it is not a switch for CFL or LED light bulbs but the packaging doesn't make it as obvious.  I was totally perplexed when we discovered the problem.  An energy efficient light switch that only works with light bulbs that are energy hogs!  The irony.

Oh, and I failed to mention the smell...

Those switches are going back to the store.  And I'm back to the drawing board.  

Have you ever had a problem like that?  Please, tell me I'm not the only one... especially since this isn't my first time with a similar problem.
Peace,
Stacey

Wednesday, November 7, 2012

Barn Wood Kitchen Floors Have Arrived

Look what was delivered yesterday!!
Our "new" kitchen floors!! I know!  I'm so excited!  (You can tell from all the exclamation marks, right?)

Our "new" kitchen floors are reclaimed from an old barn.  A tobacco drying barn from Pennsylvania to be exact.  I know.  Awesome, right?  Don't worry; the irony of its first life is not lost on me, the non-smoker.

They're knicked, scratched, knotty, and full of holes.  As promised, there's no smell just those beautiful (ugly?) stains left behind from the drying process.

Want to see what my steps are going to look like?
And, yes, I did check to see how the flooring would be packaged.  (Thanks to the suggestions in this book.)  I didn't want a lot of wasted packaging like boxes or shrink-wrap.  I was reassured to find out that the packaging would be very minimal.  (I guess they figured it wouldn't matter if it was jostled around in the semi since the scratches are part of the beauty.)  See those little binding strips in the first pictures?  Besides the pallet they were stacked on, that's all there was.  It's almost like buying in bulk.
 
Now we just have to wait 2 weeks to let the wood acclimated to our house and the local weather before we can install them.  I hope the fact that it's been drizzly for a couple days doesn't matter.
Peace,
Stacey

Monday, October 29, 2012

31 Days of Green Little Things: Cloth Napkins Aren't Just For Special Occasions

Wow!  It's Day 29 of my 31 Days of Green Little Things series.
Have you ever noticed how nice restaurants always use cloth napkins?  It just feels fancier, huh? There's just something about wiping my mouth on a disposable paper napkin that screams, "fast food, fast food, fast food!" to me.  I don't want meals at home to feel "fast" or rushed.  I want them to be relaxed and enjoyable.  Don't you?

Try using cloth napkins, it just feels better.  

And they work better, too.  One cloth napkin can stand up to the biggest, messiest meals.  Sticky, syrupy pancakes? Yep.  Drippy, melty ice cream?  You bet.  Barbecue?  What could be better than a red bandanna napkin?  (I mean, yes, of course.)  When was the last time you used just one napkin with these messy foods?  O.K., well maybe you're just a neat eater, but most of us end up with a bunch of balled up napkins on our plate!

Sure they will probably end up a little stained after awhile but that might just be the excuse I need to take up tie-dying or maybe something slightly less groovy but equally green like making dye from plantsWho knows.  I could!

Obviously, there are green reasons to use cloth napkins rather than paper.  Trees are spared.  Cloth napkins are small and easily fit into any load going in the washing machine already so they don't create more loads.  They're usually available in like-new condition at estate sales and thrift shops since most people only use them at Thanksgiving anyway.  They're reusable.  You'll create less trash.  Most of the time we're able to reuse ours at least once before they go into the washing machine.

Like I said yesterday, when I hang my napkins to dry rather than tossing them into the dryer, they look nice and pressed... almost like a fancy restaurant. ;) Now I need to go learn how to make origami napkins.
Peace,
Stacey
To follow other "31 Days" journeys, check out The Nester.
I started a Facebook page for my blog.  "Like" it if you're so inclined. (Please.)